A: Okay, first the leg was too short for the chair so we thought of something to add a bolt and a nut with a washer but the problem was that if it turned the standing part could move and the nut and bolt can break it.. So I got a bigger bolt and added 3 more nuts in the inside and one outside for the length.
Q:Whats difference between the two legs?
A: The bottom one is my teachers leg & he didnt like it because it looks like " a dog chewed on it" so after I put the long bolt and extra nuts I made an extra piece to lock those nuts and bolt down.
Q:Design of the lockdown plate?
A: Okay , so I cut a cardboad out and I cut it a little so it can bend on both sides as shown above.
A: What did you do after cardboard design?
A: I got some steel and I put the blue on it and then it drys up and you can use a caliper like I did to draw a few lines where the cuts and bends are going to be.
Q:How did you cut it?
A: I used the sheet shears also a project I did for on my other post. I cut the lines as shown in the picture and it came out good!
A:How did you improve it?
A: Well I filed it and took the edges off so it wasn't sharp and I made it more straight because the cutting is never perfect.
Q:How did you bend it?
A: I bend it using the jet combination of cut,break, and roll I bend the sides and it was good bending.
Q:Final product?
A: After bending it looked like that ! Two bends on one side and one in the back and it came out beautiful!
Q:What shall you do with it now?
Q: How did you put it on?
A: The best way to do it was to spot weld it in. So Mr.G showed me and I continued . It looked good and it should work to lock it down.
Q:Final product?
A: So we finished spot welding it and it looks so good as shown above it was very hot so I left it there for a little to cool down.
Q: Are you finished? Anything else?
Q:How did you cut it?
A: Okay I got the measurements and I used a maker to mark it in the steel. Then i used the sheet shears to cut it.
Q: What did you do next?
A:I filed it so it can have nice edges and be perfect just like the other metal part.
Q: How did you bend it?
A: I used the Jet Cut,Break, and Roll I used the roll to get it to bend.
Q: Did it work out good?
A: Yes, it works great I put it on the leg and Im going to spot weld it now.
Q:how does it look when you spot weld it?
A: The spot weld was easy all I had to do was put some clamps on it and hold it till I weld one spot and then remove them for the second weld until I did about 4 welds.
Q: After welding?
Q: Whats next?
A: There a broken part on the whole chair, so I have to make a patch for it so it wont break if someone sits on it.
Q: Cardboard design of this "patch"?
A: This is it, just ignore the horizontal lines that was the first time and it didn't go well so I made them vertically, and I measured them and it was all correct.
Q: How are you going to make this?
A: Ofcourse I used steel to make this and used the metal shears to cut it and then I bend it yet again using the jet, bake roll, and cut where the vertically line where as shown above this question.
Q:How will you patch the leg?
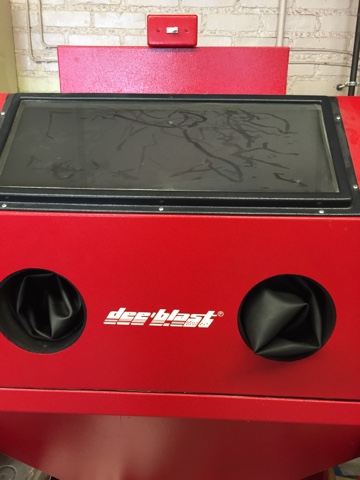
A: First I used the sand blaster to remove the paint because you cant weld with paint its not smart... I put it on and then I clamped it down so it wouldn't move when I try to weld it.
Q: did you spot weld?Was it a success?
A: There it is me spot welding it together so it fixes it i did about 7 spots just to be safe.. Now i have to sand blast the rusted leg and the welding and im going to repaint it to the original color.
Q: Whats next on to do list?
Q: How does the sandblaster work?
A: Well you put your item inside of it by opening it up then you lock it and turn the air pressure on so you can use the gun to spray the sand very fast and it removes paint because it makes it super warm...
Q: Finally how does it look after sandblasting it?
Picture?
A: So I am still working on it, i have to change the filter of the sand blaster to continue my work.
Q: Whats next after sandblasting?
A: Painting it into the original color!
To be Continued!!


No comments:
Post a Comment